
When you finalize and sign a construction contract for a major remodel, it is easy to assume that your financial planning is complete. However, the contract price is only one piece of your overall construction budget. In our project, while we had a base contract price of $790,000, the total cost ultimately exceeded $1 million once finish materials, change orders, and contingency expenses were included — and we knew going in that undertaking a structural down-to-the-studs remodel and second-floor addition would inevitably trigger unexpected expenses beyond the contract price.
The secret to surviving a major renovation financially isn’t just about negotiating a fair base price; it’s about how strictly you structure and protect your project buffer. Many homeowners treat their contingency fund as “extra money” to spend on upgraded finishes later in the process. We learned that to prevent your budget from collapsing, your 10% structural buffer must be treated as a mandatory, protected safety net.
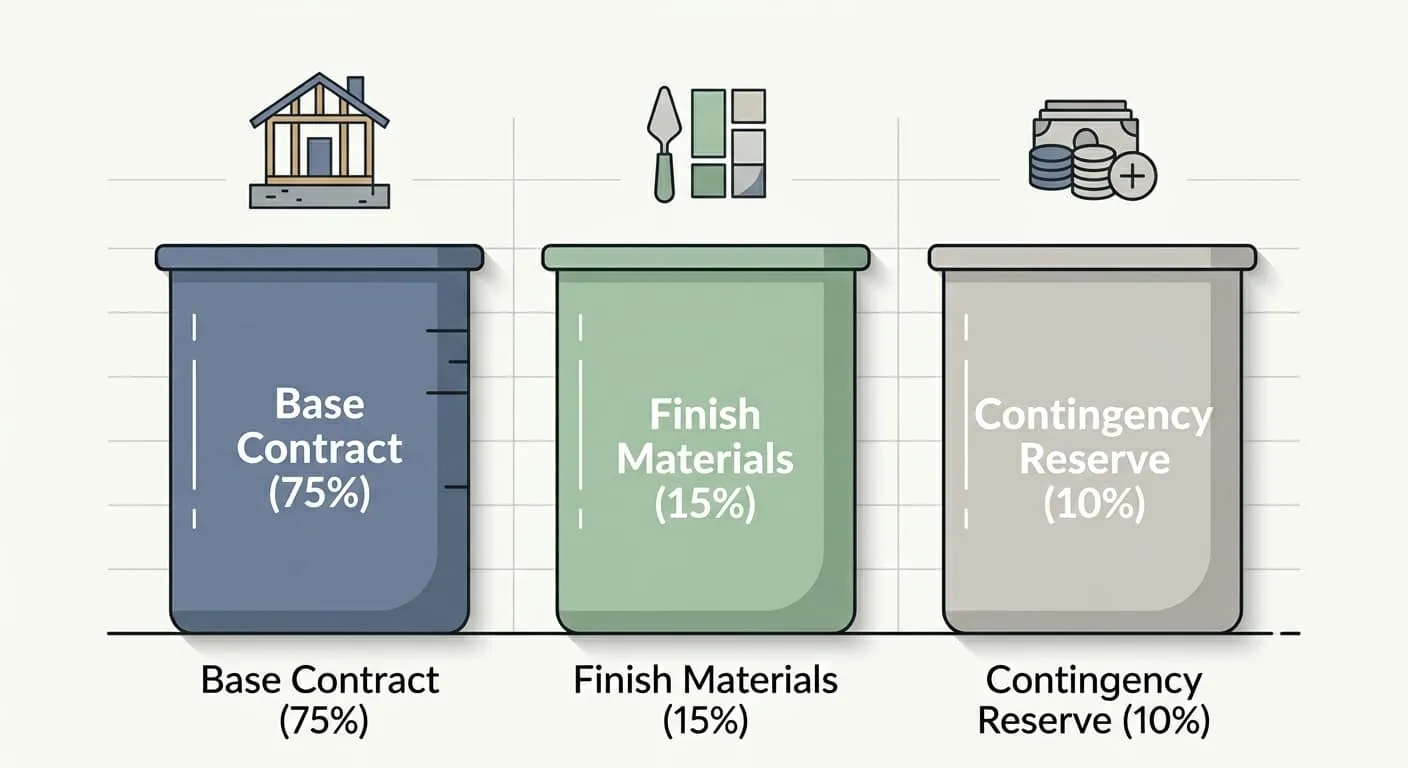
The Three-Bucket Financial Strategy
To prevent our budget from getting muddy as invoices started rolling in, we separated our construction capital into three distinct financial “buckets” or accounts:
- Bucket 1: The Base Contract ($790,000): This fund was strictly dedicated to paying the general contractor’s scheduled milestone payments.
- Bucket 2: Finish Materials ($70,000 – $120,000): This was our dedicated allowance for client-purchased finishes, including kitchen appliances, plumbing fixtures, custom tiles, wood flooring, and vanity packages.
- Bucket 3: The Contingency Reserve (10% of Base Contract): This account was kept strictly separate and was used only for unexpected, non-optional structural, code, or municipal surprises.
By isolating these funds, we prevented “finish creep”—the habit of spending structural contingency cash on higher-end appliances or luxury quartz countertops.
The Sunk-Cost Trap: Out-of-Pocket Expenses Before Framing
Homeowners expect to pay for concrete, framing lumber, and drywall. What often catches them off guard is the sheer volume of non-structural, administrative, and testing fees that must be paid before demolition even begins.
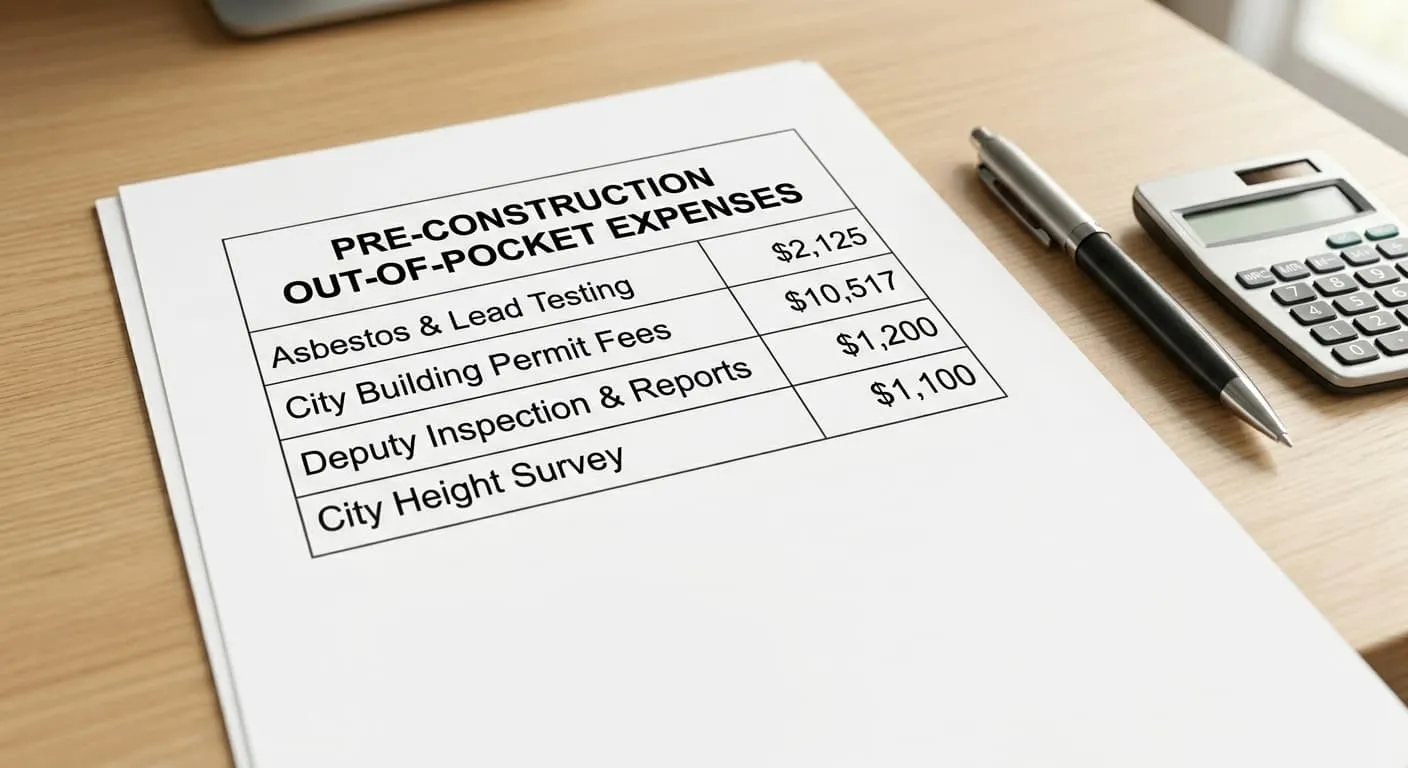
In our project, we saw thousands of dollars exit our contingency bucket before a single wall was torn down:
- Asbestos & Lead testing: $2,125 for lab sampling and labor.
- City Plan Check & Building Permit Fees: $10,517 (which was actually reduced from $42,000 thanks to a linkage fee waiver, but still represented a major upfront cost).
- Deputy Inspection & Engineering Report Fees: Over $1,200 for structural observation and concrete epoxy checks.
- City Height Survey: $1,100 to verify the second-story addition complied with local height regulations.
None of these expenses built a single wall or painted a single room, yet they were all mandatory to keep the project moving forward legally. If we had not structured a protected contingency fund, these early municipal fees would have stalled our project before we even broke ground.
Managing Mid-Project Surprises: The Spray Foam Insulation Dilemma
As construction progresses, municipal inspectors will inevitably require adjustments on site to meet current building codes. These are not optional modifications; you must comply to pass inspections and move to the next phase.
During our wall insulation phase, the city building inspector noticed our non-vented roof design. Although our approved plans specified standard fiberglass batt insulation, the inspector required us to upgrade to closed-cell spray foam insulation to prevent long-term humidity and mold risks.
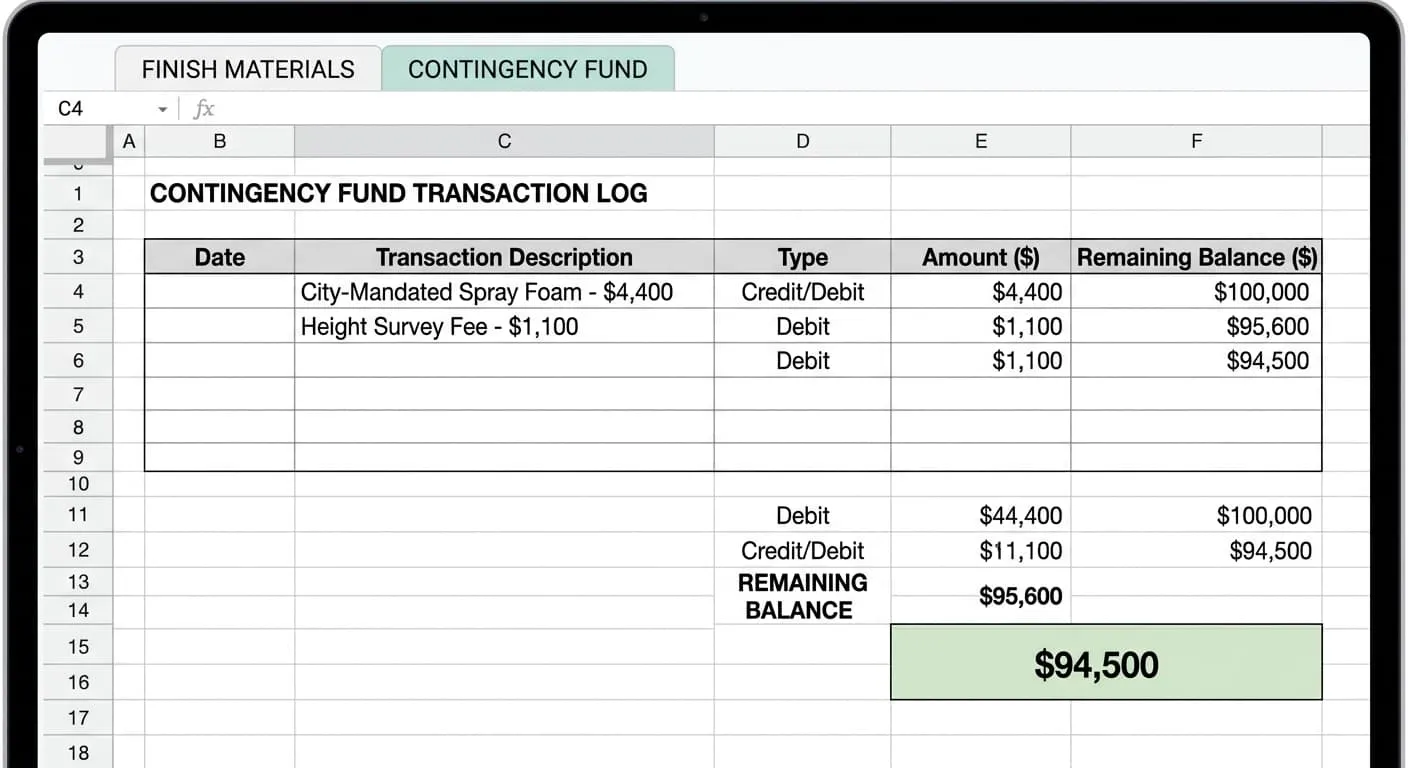
This unexpected, city-mandated change order cost us an additional $4,400. Because we had strictly protected our contingency bucket and had not spent it on high-end tiles or nicer faucets, we were able to approve the change order immediately, avoiding any scheduling delays.
Crucial Homeowner Call-Outs: What to Watch For
If you are setting up your finances for an upcoming build, keep these two budgeting rules in mind:
- Keep Your Contingency and Finish Accounts Physically Separate: Open separate bank accounts for your finish materials and your contingency reserves. When you find yourself tempted to buy a luxury kitchen faucet or a more expensive shower system, force yourself to look only at the balance of your Finish Material account. Never borrow from your Contingency account to pay for upgraded aesthetic finishes.
- Anticipate Early Site-Work Expenses: Prepare yourself mentally for the reality that a portion of your contingency buffer will be spent on environmental testing, soil compaction checks, structural surveys, and permit fees before demolition even starts. These are necessary, non-structural costs required to keep your project moving forward legally.
Start With a Realistic Cost Estimate
Before you finalize your three financial buckets, get an AI-powered baseline estimate for your project — so your contingency math starts on solid ground.
Estimate Your Renovation Costs →By structuring your project buffer as a protected safety net rather than extra spending money, you can navigate unexpected code requirements and municipal fees without derailing your construction timeline.
In Episode 8: Knowing Your Rights — State Deposit Limits, we will look at consumer protection laws in residential construction, explaining how the $1,000 deposit rule protects homeowners from upfront financial risk before a contractor lifts a shovel.