
Between December 2025 and January 2026, with our interior walls painted and our cabinetry hung, we proceeded with sourcing and organizing our final finish hardware package.
While hardware represents a relatively small percentage of your overall remodeling budget, it is a significant logistical task. A complete home remodel requires managing dozens of small, easily lost parts—including passage levers, hinges, latch strikes, cabinet pulls, door stoppers, and security locks. Coordinating these components to match your interior design palette and ensuring they are installed with precision is essential to complete your home’s aesthetic.
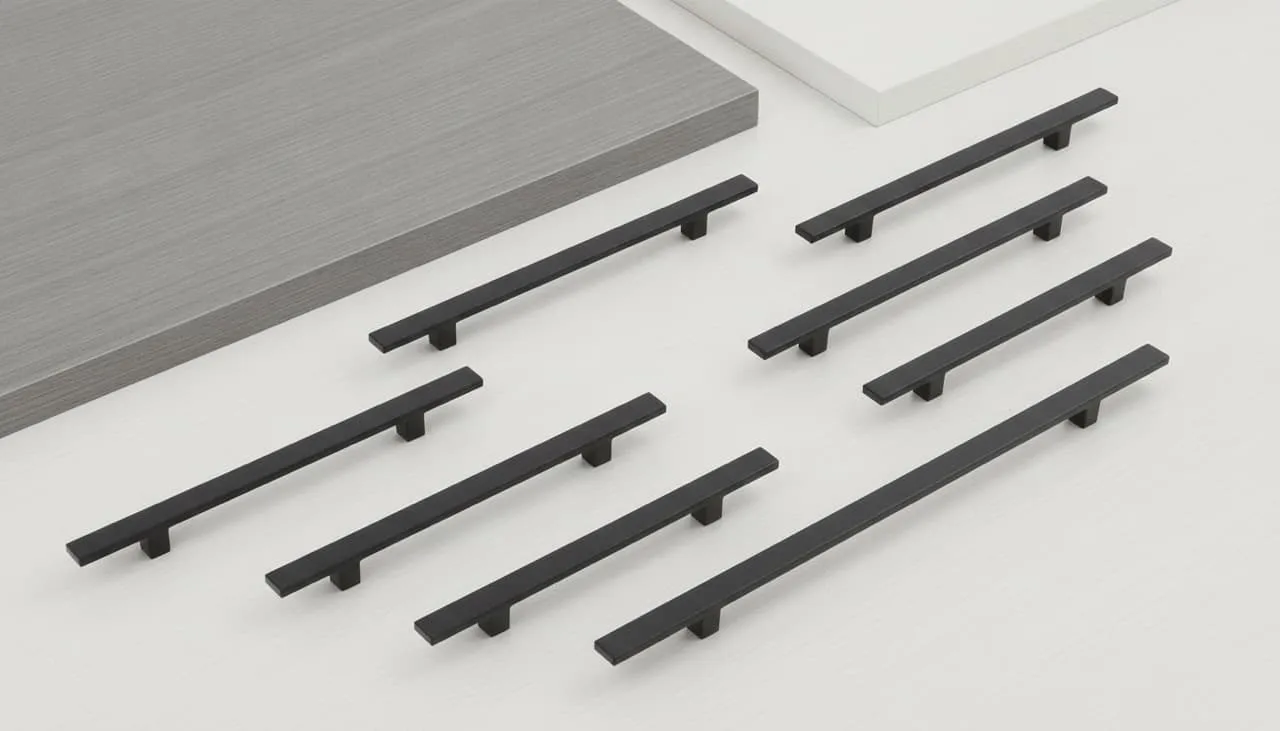
Sourcing and Organizing Our Matte Black Palette
To coordinate with our minimalist, geometric interior design, we selected a consistent matte black finish for all our functional hardware components:
- Interior Door Levers: We selected premium Emtek Dumont leversets in matte black. These levers have a clean, rectangular design that matches our baseboard and trim lines. We delivered our door hardware, along with 18 matching matte black magnetic door stoppers, to the site on December 12, 2025.
- Cabinet Pull Tabs: Cabinetry packages rarely include hardware. We sourced custom matte black pull tabs directly from our cabinetry vendor. To keep the look proportional, we selected 3-inch tabs for our narrow vanity drawers and cabinet doors, and wider 6-inch tabs for our larger vanity drawer fronts.
- The Main Entry Lock: For our custom front pivot door, we selected a digital Yale smart keypad lock in matte black, combining modern keyless entry convenience with the secure, heavy-duty latch required for a thick exterior door.
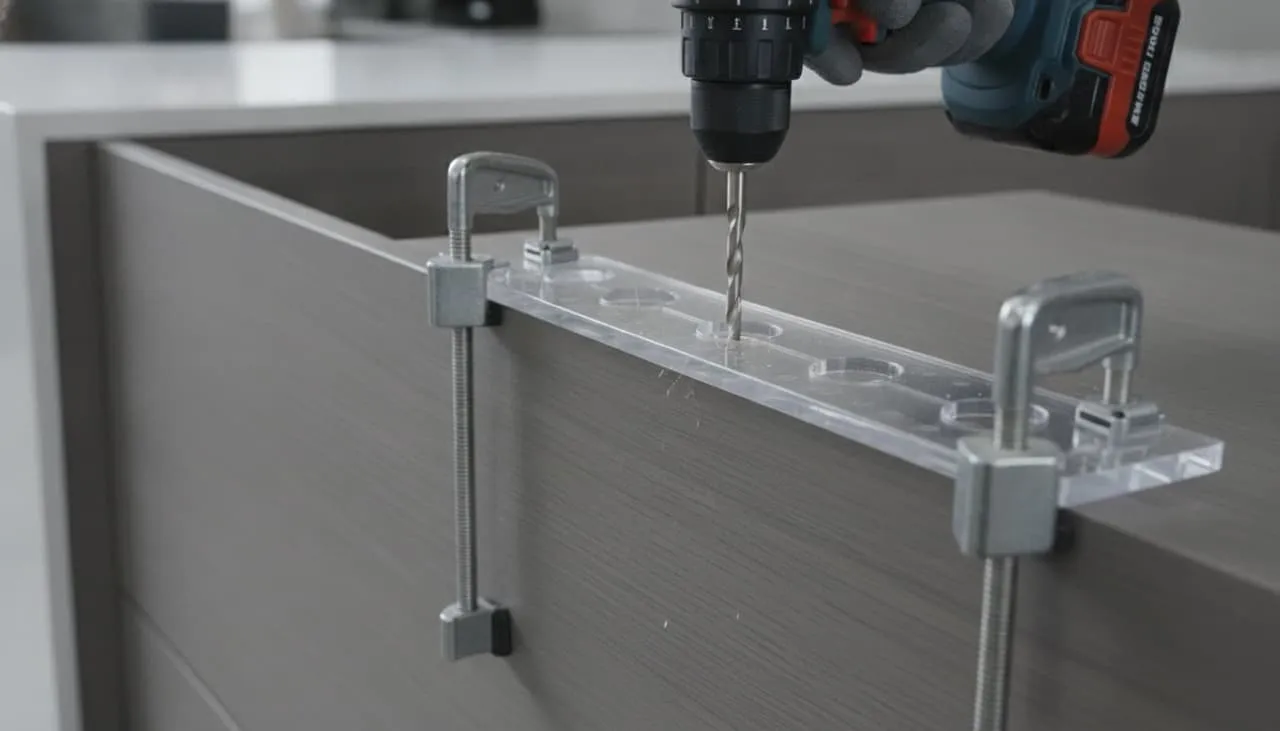
The Art of Cabinet Hardware Installation
Drilling holes into newly installed custom cabinetry is a high-risk task. If a carpenter drills a hole even slightly crooked, or if the drill bit slips across the smooth satin lacquer surface, the expensive custom drawer front is permanently ruined.
To ensure precision, we had our cabinet installers use rigid, physical drilling templates:
- The Template: A hard plastic or metal jig that clamps securely over the edge of the cabinet door or drawer front.
- The Benefit: The jig features steel-lined guide holes placed at exact, standard dimensions (such as our 3-inch and 6-inch centers), ensuring that every handle is mounted at an identical height and alignment across all drawers and doors.

Crucial Homeowner Call-Outs: What to Watch For
- Hardware is Rarely Included in Cabinet Packages: When budgeting and planning your finishes, remember that cabinet handles, hinges, and drawer pulls are typically purchased separately. Settle on your hardware design early in the process and verify that the hole-to-hole spacing matches standard industry dimensions (such as 3-inch, 4-inch, or 6-inch centers) to make sourcing and replacement easy.
- Enforce the Use of Physical Drilling Templates on Site: Do not allow your carpenters to “eyeball” the placement of your cabinet handles or door knobs with a pencil and a tape measure. Insist that they use a clamped, rigid physical template to guide their drill bit. This is the only way to guarantee that your door levers and cabinet pulls are perfectly level and aligned across the entire home.
What’s Next in the Construction Journey…
With our interior details, cabinetry, and hardware fully installed, we were preparing to connect our home to the permanent electrical grid. However, we ran into an unexpected jurisdictional hurdle at our property line. Join us in our next post, Episode 41: The Power Line Standoff — Private Tree Trimming vs. Utility Bureaucracy, as we share the process of coordinating between private tree trimmers and municipal power crews to clear our incoming electrical connection drop.