
In mid-October 2025, our roof had passed its initial watertight certifications, and our drywall had been hung and plastered. Then, the first major autumn rainstorm hit. Suddenly, we received an urgent call: water was actively dripping through our newly completed ceiling.
My partner’s father was visiting the house and first spotted the water dripping, alerting us to the leak. I immediately scheduled an emergency meeting with our project manager, David, for 9:00 AM the following morning to inspect the damage and locate the leak.
We discovered that water was dripping directly from our ceiling return air register—right beneath where our heavy, rooftop-mounted package HVAC unit sat. This began a meticulous, multi-day coordination process to find, test, and seal a stubborn roof leak before it could damage our interior finishes.
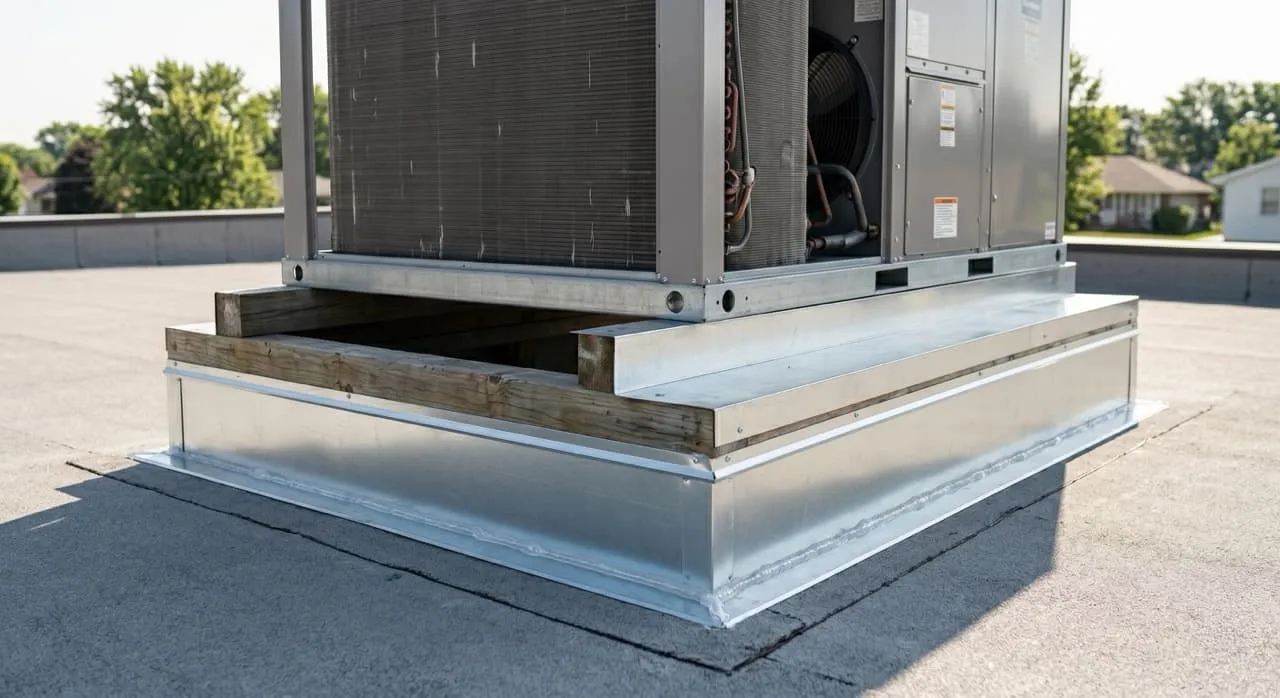
The HVAC Curb Problem: Why Rooftop Units Leak
Rooftop-mounted package HVAC units are heavy and cannot sit directly on your flat roof’s sheathing. Instead, carpenters build a raised, wooden box frame—known as a curb—for the unit to rest on.
The metal flashing around this curb must seal perfectly with the surrounding roof membrane. This interface is highly vulnerable to water leaks for several reasons:
- Vibration Stress: The HVAC unit contains heavy compressors and fans that create constant, minor vibration during operation. Over time, this vibration can stress the metal flashing seams, cracking seals that were initially watertight.
- Complex Angles: Flashing around a square curb requires multiple 90-degree corner joints, overlapping layers, and sealant. A single pinhole gap in a corner weld can draw water inside during heavy rain.
- Direct Duct Pathways: Because the heating and cooling ducts pass directly through the roof inside the hollow curb box, any water leaking past the flashing enters your interior duct system, dripping out of your ceiling vents.
The Subcontractor Blame Game
When a roof leak occurs around a rooftop HVAC unit, it routinely triggers a dispute where subcontractors blame each other:
- The Roofer’s Argument: “Our roofing membrane was 100% waterproof. The HVAC crew damaged the flashing when they set the heavy unit down onto the curb.”
- The HVAC Installer’s Argument: “The unit is placed correctly. The roofer failed to seal the curb corners properly before we arrived.”
To resolve this standoff, we had our project manager coordinate a joint site visit. We had the roofer and the HVAC technician meet on our roof at the same time to inspect the flashing together. This collaborative approach put an end to the finger-pointing, allowing the team to identify a tiny pinhole gap in a corner flashing weld beneath the HVAC unit’s overlapping metal skirt.
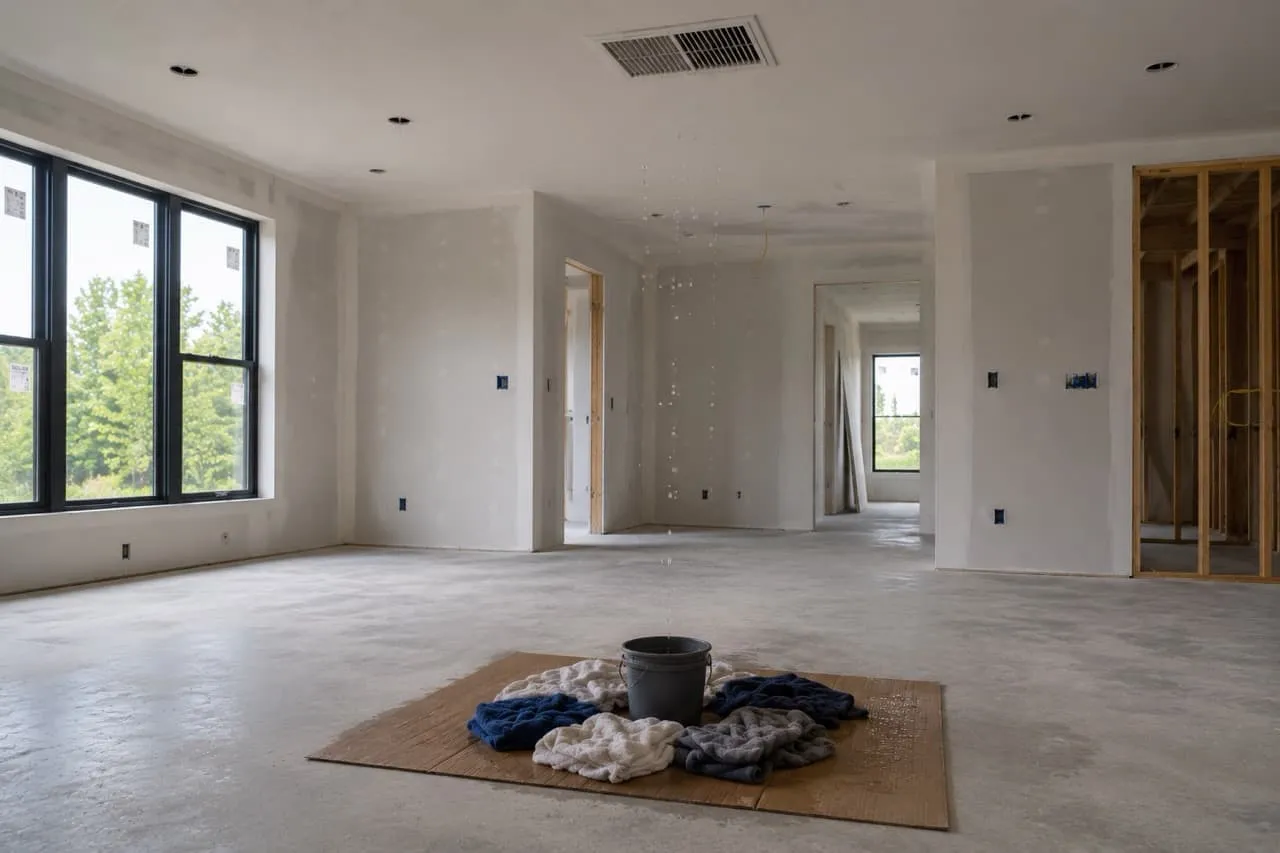
Protecting Our Finishes on Site
While we were chasing the source of the leak, we had to protect our newly delivered wood flooring. The hardwood boards had already been placed inside the home to acclimatize to the humidity before installation.
To prevent these expensive wood planks from suffering water damage, we set up a temporary protection zone directly beneath the dripping vent:
- Drip Catchers: We placed wide plastic buckets on top of thick cardboard sheets to catch the water.
- Absorbent Barriers: We packed dry towels around the buckets to absorb any splashing water or moisture.
- Monitoring: We visited the site daily during the rains to empty the buckets and change the towels, ensuring the moisture remained fully contained.
Crucial Homeowner Call-Outs: What to Watch For
- Enforce a Joint Subcontractor Inspection: If you experience a leak near a rooftop HVAC unit, do not let the roofer and HVAC crews inspect the site separately. Force both subcontractors to meet on your roof together with your project manager. This collaborative meeting ensures that both trades agree on the source of the leak and coordinate the repair properly.
- Inspect and Photograph the Leak During Active Rain: The most effective way to identify the source of a leak is to inspect the underside of your roof deck from the attic or open framing while it is actively raining. Use a high-powered flashlight, trace the water path up to its highest point of entry, and take clear photos and videos to show your roofing crew.
- Never Install Wood Floors Until the Roof is 100% Watertight: Do not allow your flooring crew to glue or nail down finished wood flooring until your roof has successfully withstood a major rainstorm with zero water leaks. Wood flooring absorbs moisture quickly; if installed under a leaky ceiling, the boards will buckle and cup, requiring a complete, expensive tear-out.
What’s Next in the Construction Journey…
With our rooftop HVAC curb flashing fully sealed and successfully tested through the subsequent rains, our interior is completely watertight. Join us in our next post, Episode 31: Floor Preparation — Cork Underlayment & Leveling, as we prepare our subfloors, glue down our acoustic cork sheets, and establish perfectly level floors before installing our hardwood planks.