
When building a two-story home addition, spatial privacy is often overlooked until the family moves in and realizes they can hear every footstep, voice, and water drainage sound throughout the house.
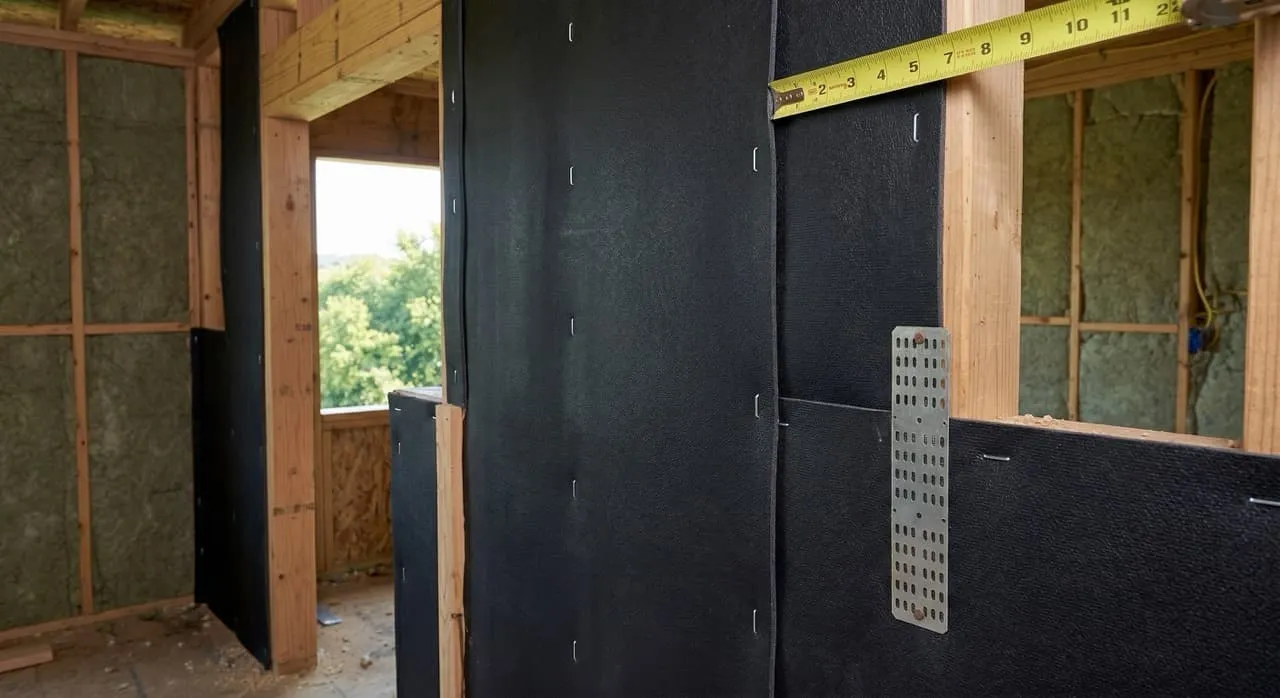
To prevent these acoustic issues, we designed a comprehensive soundproofing strategy before hanging drywall. By utilizing a combination of dense rock wool insulation (Rockwool) and heavy Mass-Loaded Vinyl (MLV) barriers, we targeted our interior partition walls and ceilings to block both airborne noise (such as voices and music) and structure-borne vibration (such as footsteps and HVAC humming).
The Two Pillars of Soundproofing: Density and Decoupling
To block sound effectively, you must address the two ways sound travels through a building: airborne transmission and structure-borne vibration. We tackled this by combining two distinct high-performance materials:
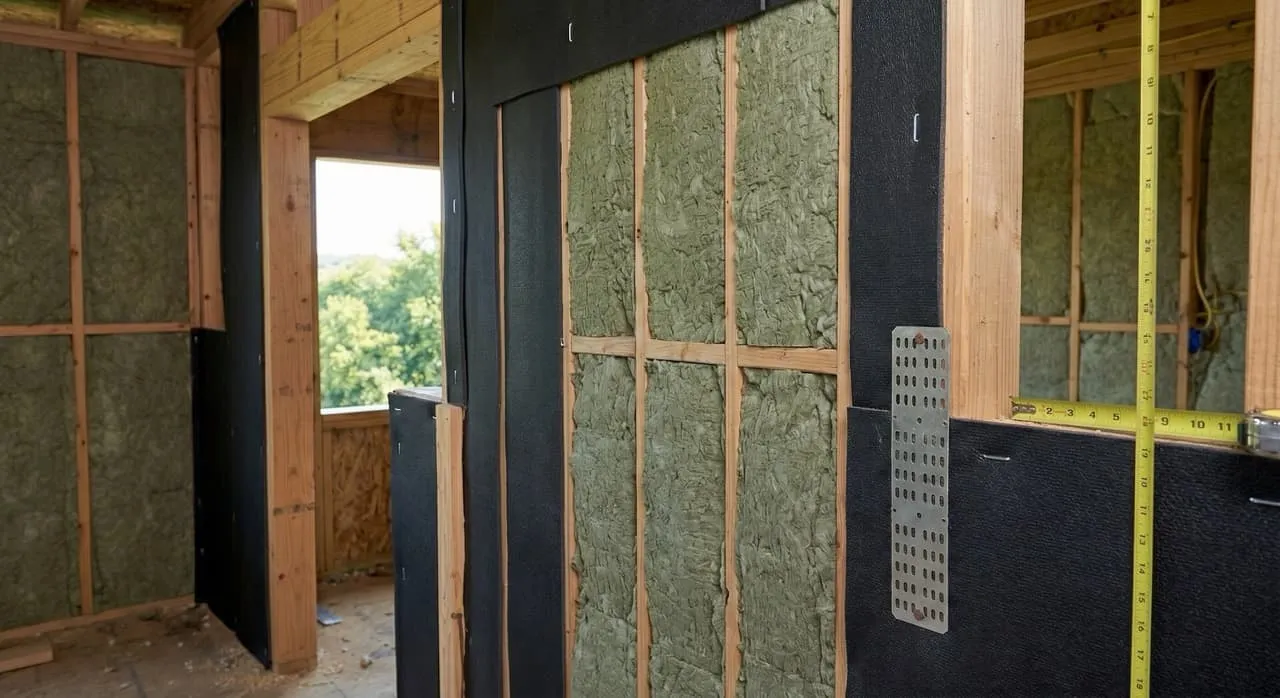
- Density (Airborne Absorption): For our interior wall cavities and first-floor ceilings, we bypassed standard pink fiberglass insulation and invested $650 to upgrade to dense stone wool insulation (Rockwool). Made from spun volcanic basalt rock, Rockwool is significantly denser than fiberglass, allowing it to trap and absorb airborne sound waves rather than letting them pass through wall cavities.
- Decoupling (Vibration Blocking): For our critical partition walls (such as around bedrooms and bathrooms) and first-floor ceilings beneath the second-story master suite, we installed Mass-Loaded Vinyl (MLV). MLV is a heavy, limp-mass material (measuring 1 lb per square foot and 1/8” thick) that adds density to walls without adding rigidity. This limp mass deadens structural vibration, preventing sound waves from physically vibrating the wood studs and transferring noise to the adjacent room. We sourced these heavy rolls at $311 per roll from our supplier.
Real-World Lessons: The Bedroom 2 and WIC Layout Misunderstanding
Even with detailed planning, misunderstandings on a active construction site can occur. In our project, our contract addendum specified installing MLV on the “Bedroom 2 wall” to soundproof the space. Our framing carpenters interpreted this literally, installing the black vinyl sheets on the interior wall partition directly inside Bedroom 2.
However, our actual design intent was to block sound traveling between the adjacent Bathroom 2 and the Walk-In Closet (WIC) area. By the time we noticed, the Bedroom 2 wall was already closed up with insulation.
Rather than engaging in a dispute over the wording of the contract, we worked collaboratively with our project manager and general contractor to find a solution:
- The Resolution: We agreed to purchase additional MLV material to cover the actual Bathroom 2/WIC partition wall.
- The Cost: Our builder drafted a minor change order for the extra labor and material. While the initial quote was $395, our builder agreed to deduct $100 as a gesture of goodwill to keep our relationship positive, resulting in a net cost of $295.
- Verification: To ensure accuracy before drywall was hung, our project manager, David, took detailed photographs of the updated MLV installation in the closet and bathroom partitions, uploading them directly to our shared digital folder.
Crucial Homeowner Call-Outs: What to Watch For
- Overlap All MLV Seams and Seal with Acoustic Tape: Sound behaves like water; if there is even a tiny 1% gap in your soundproofing barrier, up to 50% of the sound can leak through. Ensure your installation crew overlaps all MLV seams by at least 2 inches and seals the joints securely with heavy-duty foil or specialized acoustic tape.
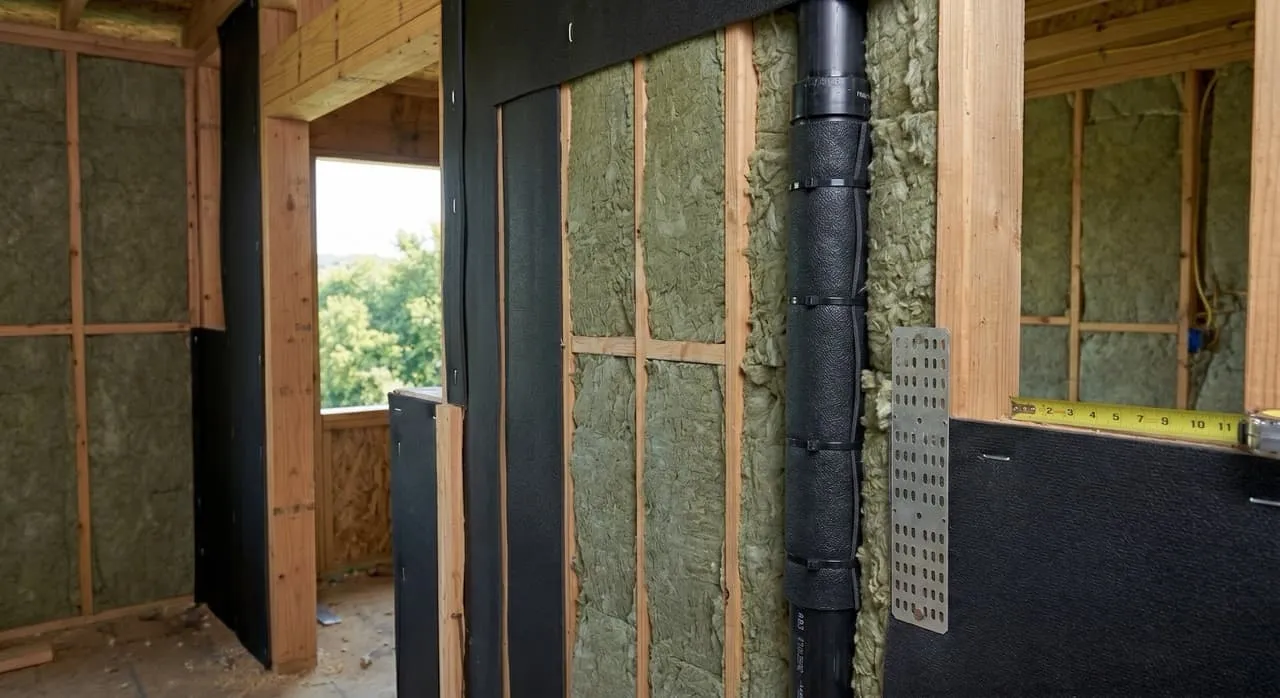
- Wrap Your ABS Bathroom Waste Lines: One of the most common residential noise complaints is the loud sound of rushing water inside the walls when an upstairs toilet is flushed. Standard black ABS drain pipes are thin and transfer this water noise easily. Have your plumbers wrap all in-wall ABS waste lines in leftover MLV sheets, secured with zip ties, before packing the stud bays with Rockwool insulation.
What’s Next in the Construction Journey…
With our interior walls insulated and soundproofed, we are ready to address our building envelope’s final insulation requirements. Join us in our next post, Episode 28: Unforeseen Upgrades — Spray Foam vs. Batt Insulation, as we navigate the costs and performance differences of city-mandated thermal upgrades.