
Before your exterior windows and doors can be delivered and installed, your framing carpenters must construct the precise wood borders—known as rough openings (ROs)—inside your wall studs.
Preparing these openings requires exceptional framing precision. If a window sill is even slightly unlevel, or if the rough opening dimensions are off by a fraction of an inch, your newly ordered windows will not fit, or worse, they will bind and leak over time. Understanding how structural headers carry loads over these openings, why level sills are essential, and how to properly flash the wood frames is critical before your windows are delivered to the site.
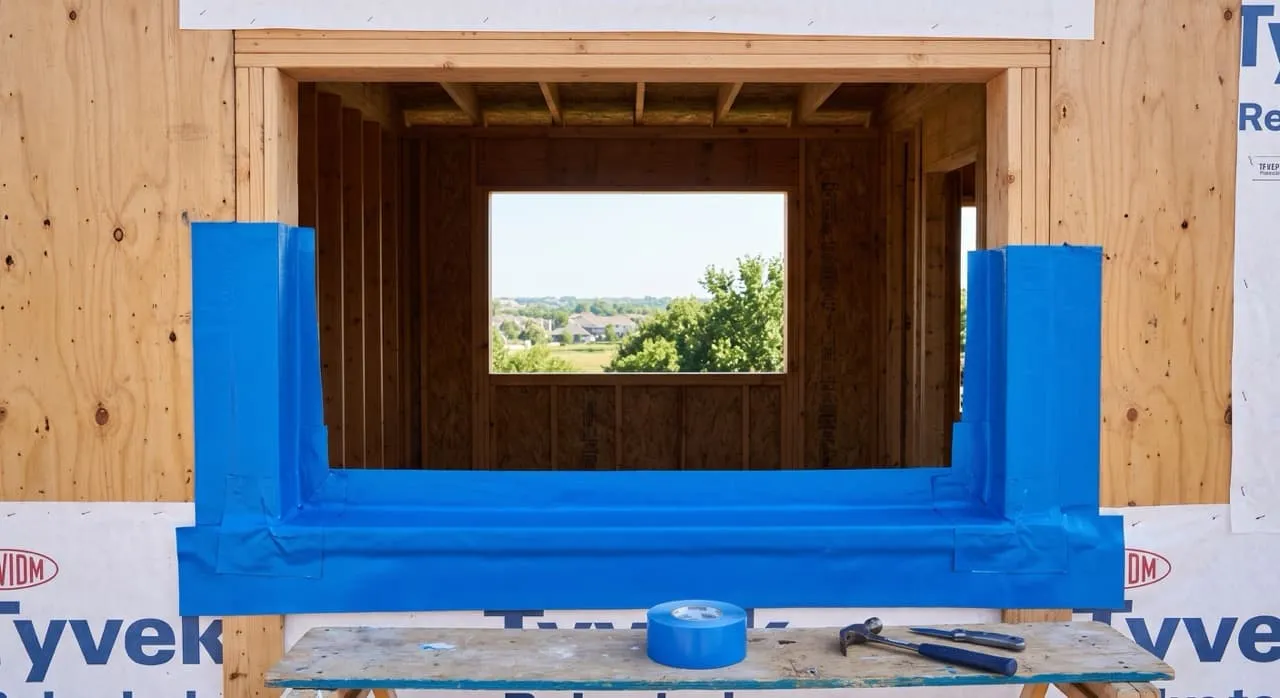
The Anatomy of a Rough Opening
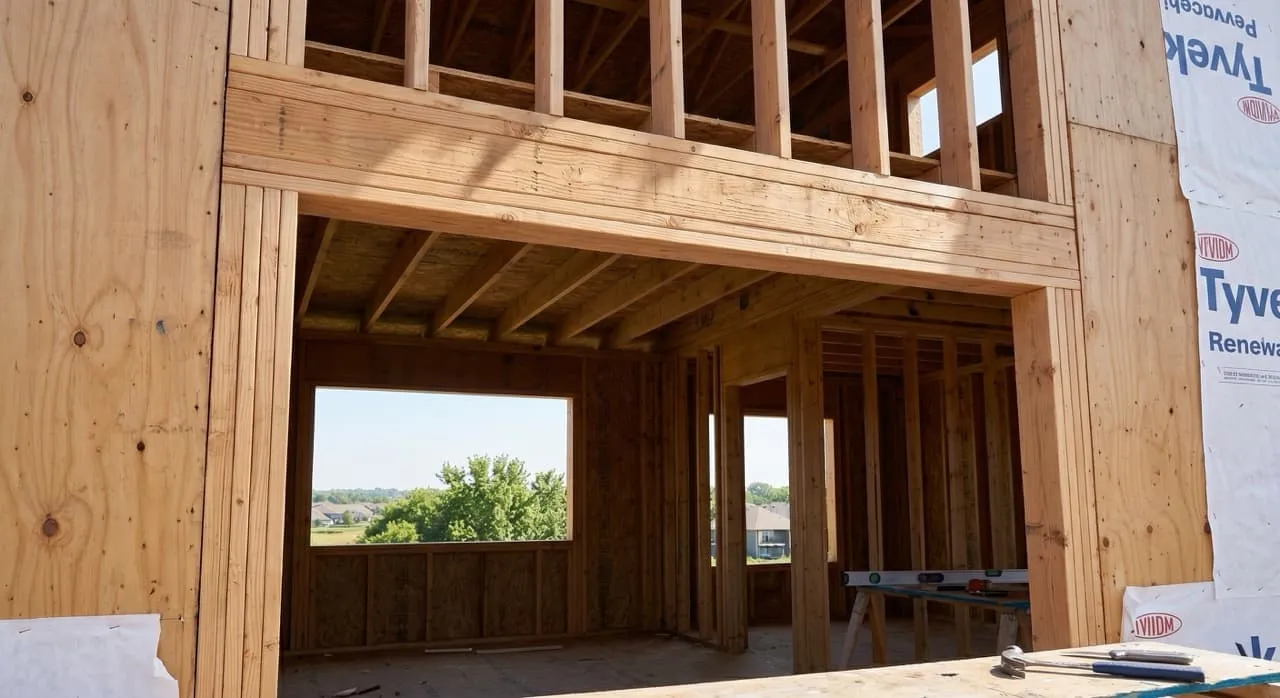
A rough window or door opening is a structural framed box within your standard vertical wall studs:
- The Sill: The horizontal bottom plate of a window frame.
- King Studs and Jack Studs: Vertical studs on both sides of the opening. The continuous king studs run from the floor plate to the top plate, while the shorter jack studs are nailed directly inside them to physically support the weight of the horizontal header above.
- The Header: A thick structural wood beam (such as sistered 2x10s or engineered lumber) running horizontally across the top of the opening. The header acts as a bridge, collecting the vertical loads from the roof or second floor above and distributing them safely around the opening down to the foundation.
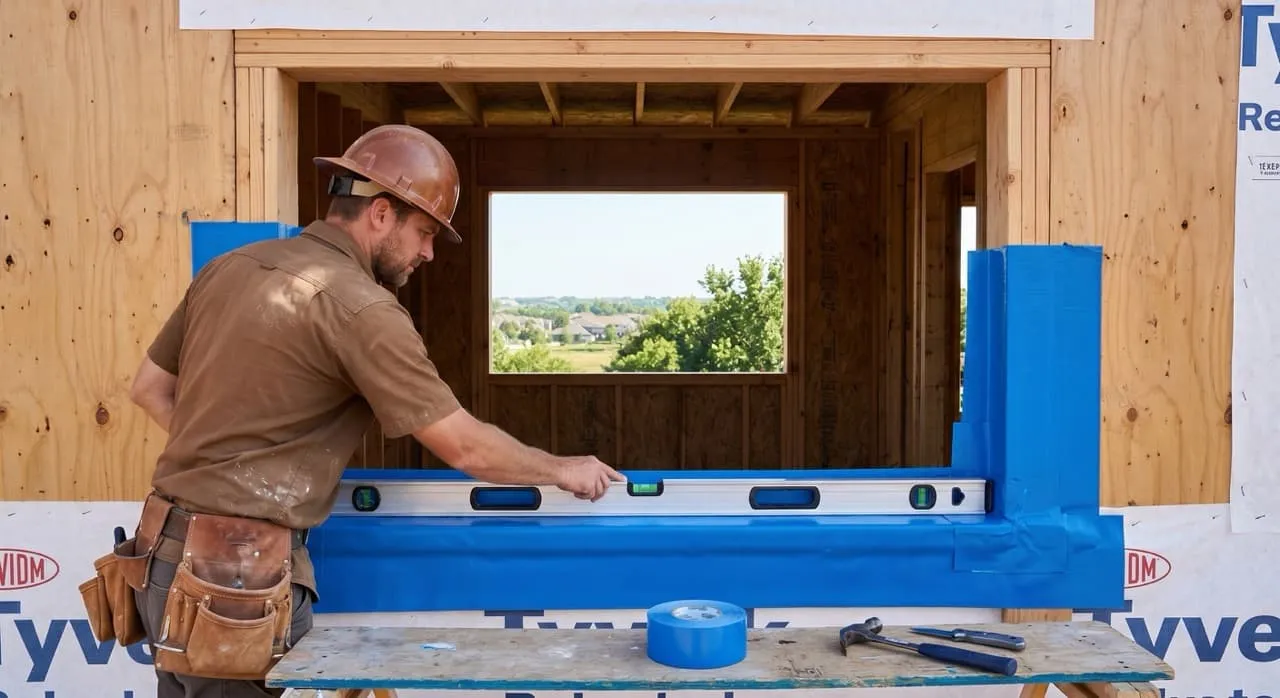
Sill Leveling & Header Sizing
If a window sill is sloped, the window frame will sit unevenly. When you attempt to open, close, or lock the window sash, it will bind against the track, causing friction and eventually failing to seal properly. Our carpenters utilized precision levels on every sill plate, adjusting the wood with shims where necessary to ensure perfect alignment.
Additionally, for our wide first-floor windows, our structural plans specified heavy-duty engineered headers to carry the weight of the new second story. If a header is undersized, it can sag over time under the vertical weight of the house, pressing directly down onto the window frame, which can crack the glass and permanently jam the windows.
The Waterproofing Barrier: Sticky Flashing Tape
Wood is vulnerable to moisture. When rain hits your exterior walls, water can easily seep through minor gaps in the exterior siding or window frames, running behind the walls and causing wood rot and mold.
To prevent this, our crew wrapped every rough opening in a high-performance, self-adhesive flashing membrane (sticky flashing tape):
- The Sill Pan: Plumbers and carpenters applied the rubberized asphalt tape over the horizontal sill plate first, wrapping it up the vertical jamb studs by at least 6 inches to create an overlapping, watertight pan.
- The Shingle Effect: The flashing tape is applied sequentially from bottom to top, ensuring that any moisture running down the walls naturally flows outward and over the flashing layers rather than behind the wood framing.
Crucial Homeowner Call-Outs: What to Watch For
- Double-Check Rough Opening Dimensions Against Your Spec Sheet: Do not assume the carpenters framed the openings correctly based on the plans. Grab your window order spec sheet and a tape measure, and physically measure every single rough opening width and height on your site. A 1-inch framing error (too small or too large) can stall your window installation by weeks while you wait for the crew to cut, modify, and rebuild the framing on site.
- Insist on Self-Adhesive Sill Flashing Membranes: Do not allow your contractor to install windows directly over bare, unprotected wood framing sills. Ensure your framing crew wraps every sill and lower jamb in heavy, self-adhesive waterproof flashing tape. This sticky tape is your primary line of defense against water leaks behind your exterior stucco and interior drywall.
What’s Next in the Construction Journey…
With our roof sealed, our framing secure, and our rough window openings framed and flashed, our home’s structural envelope is prepped. Join us in our next post, Episode 26: Surviving Rough Inspections — The Project Pause, as we prepare for the crucial municipal inspections that must be passed before we can close up our walls and start on our interior finishes.