
Before the demolition crew arrived on site with sledgehammers, we completed a critical step: salvage coordination. Tearing down a house does not mean you have to throw everything away. Our existing home contained several high-quality, reusable items—including an old cast-iron bathtub, high-end shower valves, a sliding barn door, and custom window shutters—that were in excellent condition.
By taking the time to carefully salvage and store these fixtures before demolition began, we saved thousands of dollars on our finishing budget and kept durable materials out of local landfills.
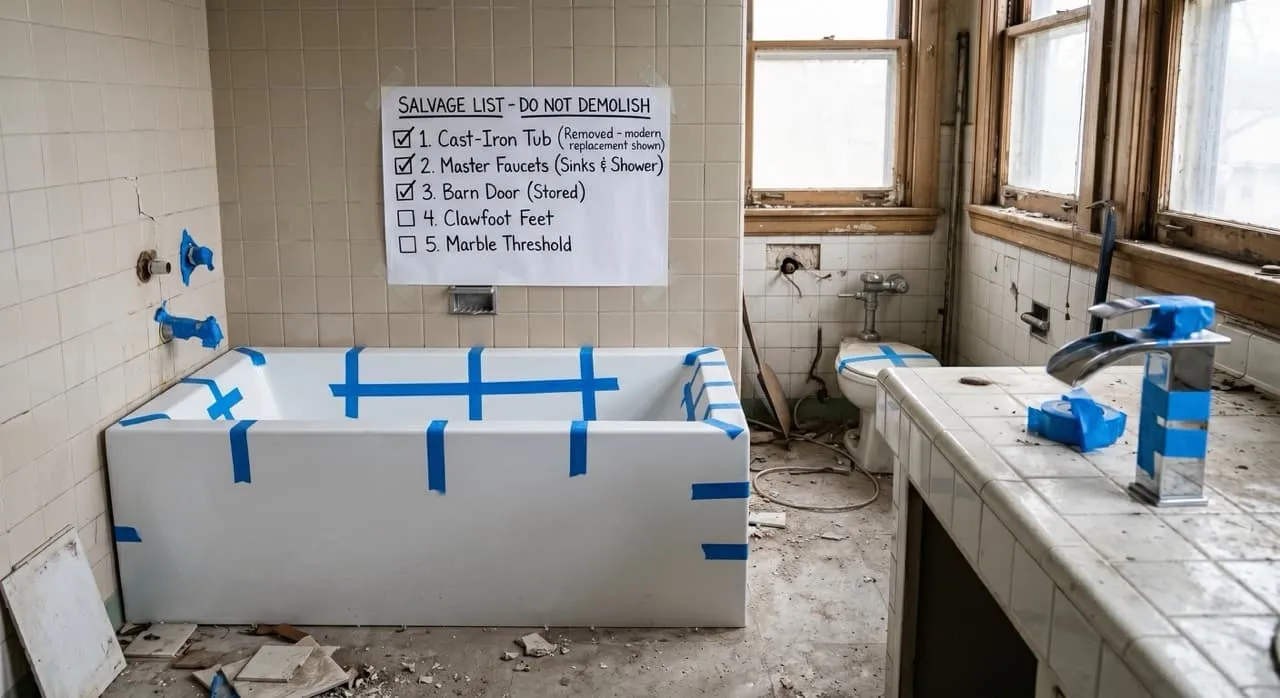
The Blue Tape Salvage Walkthrough
We walked through the house with our general contractor’s project manager to complete a detailed salvage walkthrough:
- Marking Saved Items: We placed bright blue painter’s tape on every item we wanted to preserve, including the cast-iron master bathtub, plumbing valves, shower faucets, window shutters, and the barn door.
- Documenting the List: We compiled a written, numbered list of these items, had our project manager sign it, and uploaded it to our shared cloud folder to ensure everyone was aligned.
- Careful Removal: The plumbing crew carefully disconnected the fixtures and unbolted the tub before structural demolition began, preventing damage from falling drywall and lumber.
Setting Up On-Site Storage
Removing fixtures safely is only half the battle; you must also protect them during construction. A active job site is a harsh environment filled with fine concrete, plaster dust, and heavy tools.
To keep our salvaged items safe, we coordinated a specific storage plan:
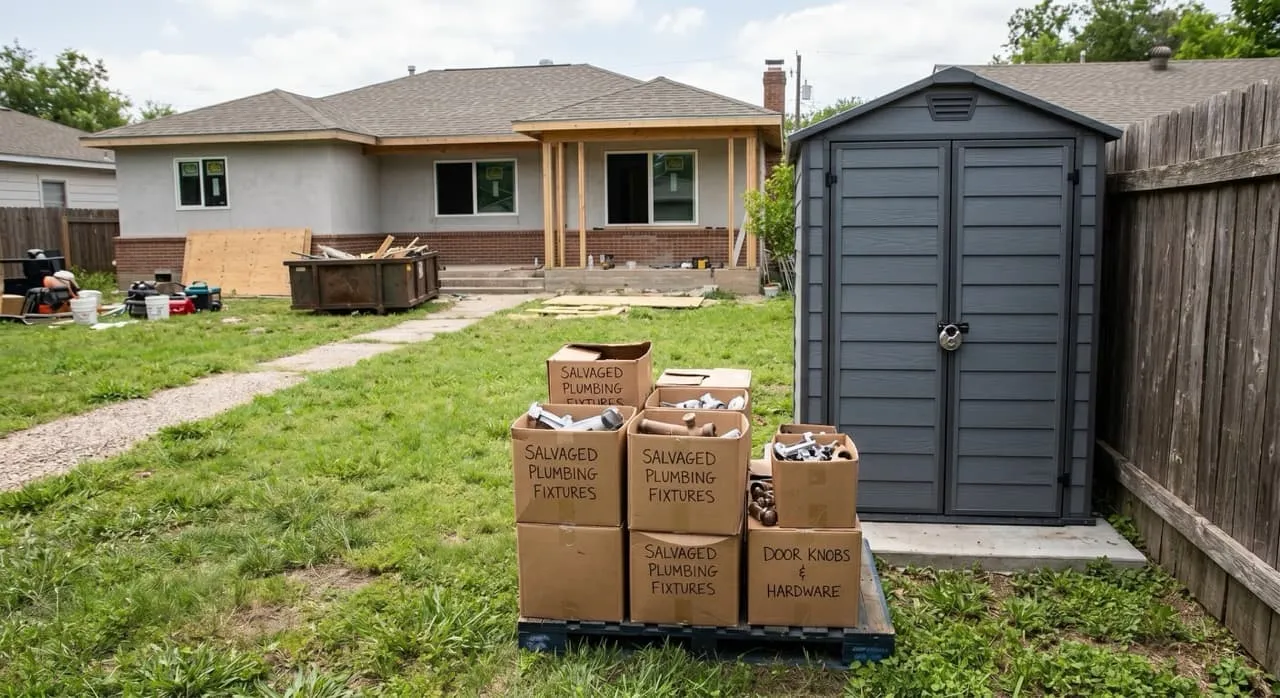
- The On-Site Storage Shed: We set up a small, lockable weatherproof shed in our backyard.
- Protective Packing: We wrapped our salvaged cast-iron tub in heavy moving blankets and stretch wrap, and packed smaller plumbing fixtures and door handles into sturdy, labeled cardboard boxes.
- The Risk of Exposure: While storing items in the yard next to a shed is fine temporarily, we knew that exposure to wind, rain, and construction dust could rust or damage delicate finishes. Placing our saved items in a clean, locked environment ensured they remained in identical condition until they were ready to be re-installed late in the project.
Crucial Homeowner Call-Outs: What to Watch For
- Inspect Saved Items Immediately Upon Removal: When fixtures are removed by demo crews, inspect them immediately for any damage. Note any pre-existing blemishes and document them with photos to prevent disputes later.
- Do Not Lose Your Plumbing Valve Templates: If you are salvaging and reusing high-end shower valves (such as Brizo or Kohler), ensure the plumber saves the original plastic mud guards and mounting brackets. Without these, reinstalling the valves behind newly tiled walls can be incredibly difficult.
Pre-Demo Salvage Walkthrough Checklist
The full salvage walkthrough checklist — plumbing valves, lighting, hardware, doors, and post-removal storage protocol. Walk it with your GC before the first demo crew arrives.
Open the Checklist →What’s Next in the Construction Journey…
In Episode 15: Setting the Perimeter — Mobilization and Neighbors, we’ll cover site mobilization — how we installed our perimeter fence, set up temporary facilities, and proactively managed our neighbor relationships before the first demolition crew arrived on site.